The Art of Book Making
- Feb 19, 2025
- 2 min read
Updated: May 12, 2025


Supplies List:
Bone Folder
Awl
Cutting Mat
Sewing Needle
12 sheets of paper: 8.5x11
Book Clip
Cardboard
Thread
Paper Cutter
Pencil
Ruler
Scissors
Folded paper
Terminology:
Score - a light cut on your paper, as to not cut through the material but only an incision for the material to easily be folded without creating a crease.
Hot dog style - folding paper vertically
Hamburger style - folding paper horizontally
Signature - a group of folded paper, 3-4 papers in total
Creating Signatures:
Fold a piece of paper hamburger style, with the shorter ends of the paper into each other. Use the bone folder to make sure that the fold is neat and crisp.
Neatly organize 4 of them into a pile, repeat this 3 times to create 3 signature.

Jig

With the dotted paper, fold it into hamburger style twice, so that afterwards, the paper is divided into 4 equal section.
Repeat the same process hot dog style after unfolding the paper.
Then with the awl, pierce 9 holes into the paper, each at an intersection of the creases created by the folds.
Use the jig to measure the middle of your signatures and put a hole through them using the awl
Cardboard

On your cardboard, measure 5 inches from both sides, so that there is a 2 inch with space in the middle
Apply your jig onto the cardboard and poke in the 9 holes that matches through the cardboard
After that, on the edge of that 2 inch width space, lightly score the cardboard so that the edges can be folded inwards
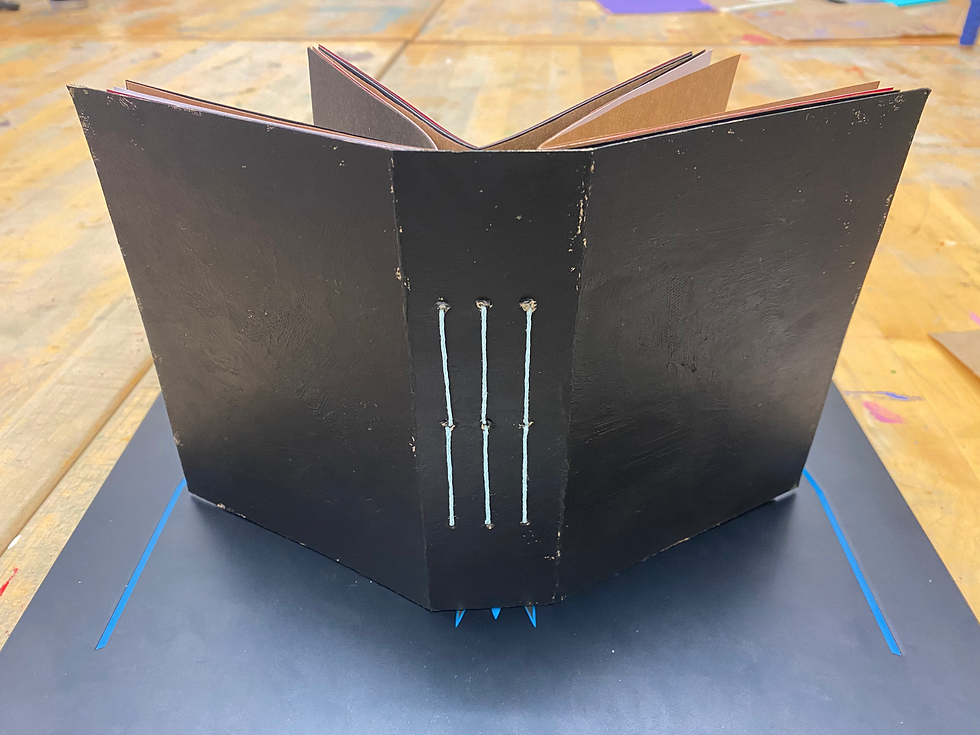
The Stitching

Take your first signature and line the middle fold (with the holes) up with the vertical row of holes on the left most of the card board.
Choose your string of color and with a clip board, secure the signature, the card board and the string together.
Attach the string to a needle, and push it through the middle hole of both the signature and the cardboard.

From the outside of the book, push the string and needle into the bottom hole through the 2 layers again.
Then, repeat with the top hole.
Finally, push the string and needle through the middle from the outside and detach the string from the needle

Proceed to tie the two loose ends of the string together into a knot, and keep it as close to the signature as possible to make sure it's tight and secured
Repeat the process 3 times for all of the signature, then you will have a sketchbook finished.
Add your finishing touch with paint, color or other media forms.


Comments